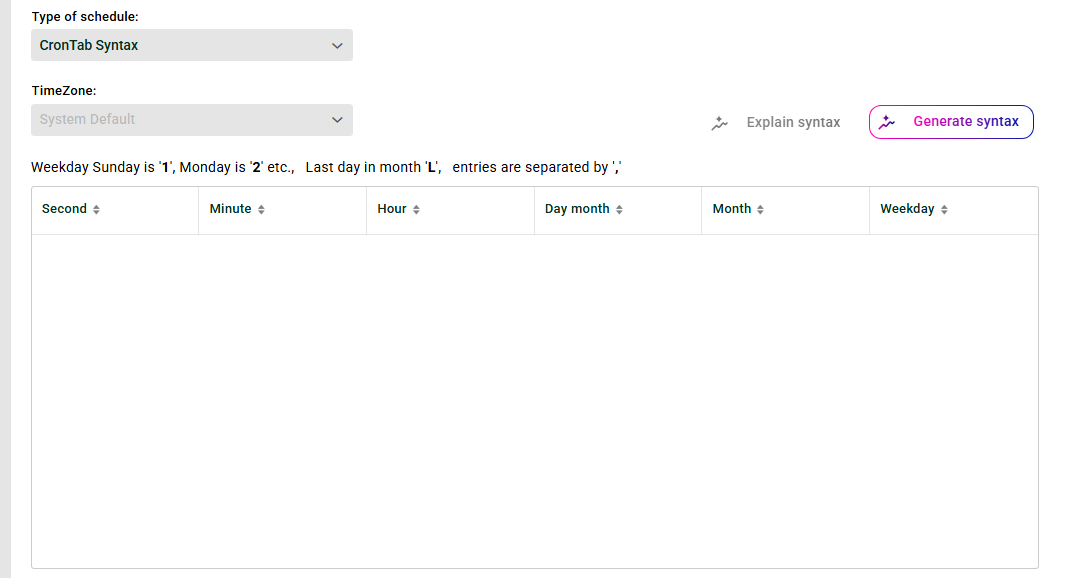
This screen lets you configure scheduled input agents using crontab syntax. The context menu provides templates and a cron wizard. You can also define custom templates in a configuration file. Pathfinder adds AI-supported explanations and generates cron entries.
IMPORTANT:
For manual entry, use only values between
0and59for seconds and minutes. For hours, use only values between0and23. Use the cron wizard whenever possible.This syntax resembles the crontab syntax in UNIX systems. The weekday numbering differs, however: Sunday starts with
1here. The "Day" column, for example, uses1for the first day of the month. The valueLstands for the last day of a month. The value*means every day.Avoid a single asterisk
*in the "Seconds" column. This means every second and has a strong impact on performance.A profile might still be running when a new start time arrives. In that case, the system skips the start.
Cron jobs run only while the Lobster Data Platform and the
_dataservice are running.The machine might be inactive at the scheduled time. In that case, the system does not run the missed job later. Profiles start only at the configured time.
Context menu
Next run | Opens a pop-up that shows when the next profile run will be triggered. |
Create copy | Creates a copy of the selected cron entry. |
Remove entry | Removes the selected cron entry from the list. |
Add new entry | Adds a new, empty cron entry. |
Add template (plus icon) | Selects a predefined template. |
Add template (person icon) | Selects a custom template. See the section "Defining custom cron templates" below. |
Cron wizard | Opens the cron wizard, which lets you create an entry by selecting predefined values. |
Remove all entries | Removes all existing cron entries from the list. |
Examples
The following table shows examples for setting the time points with crontab syntax. You can find comprehensive explanations and examples for crontab syntax in external sources. This is a widely used concept.
Seconds | Minutes | Hour | Day (month) | Month | Weekday | Meaning |
|---|---|---|---|---|---|---|
0 | 0 | * | * | * | * | Every full hour. |
0 | 15 | 10 | * | * | 1 | Every Sunday at 10:15. |
0 | */20 | * | * | * | * | Every 20 minutes, starting from full hours and on the full hour. Example: You save your profile at 16:56 with these settings. Then it runs at 17:00, 17:20, 17:40, 18:00, 18:20 … |
0 | */21 | * | * | * | * | Every 21 minutes, starting from full hours and on the full hour. Example: You save your profile at 16:56 with these settings. Then it runs at 17:00, 17:21, 17:42, 18:00, 18:21 … NOTE: Do you want the next run exactly 21 minutes after the last one? Use intervals instead. |
*/10 | * | * | 1 | 12 | * | Every 10 seconds on December 1 (starting from full minutes and on the full minute). |
0 | */10 | 6-8,16-19 | * | * | * | Every 10 minutes between 6-8 and 16-19 hours (starting from full hours and on the full hour). |
0 | 0 | 18-6/2 | * | * | * | IMPORTANT: Do not use entries that cross midnight, for example |
Defining custom cron templates
You can define custom templates in the configuration file ./etc/admin/datawizard/cron_templates.txt. You do not need to restart the Integration Server for this.
# here you can define custom cron templates
# <name of template> = <cron syntax>
# the name should not contain "="

# Example - values on right separated by single blank
Every Friday at 22:00 = 0 0 22 * * 6
Pathfinder
Explain syntax
You can get an AI explanation for a specific cron entry.
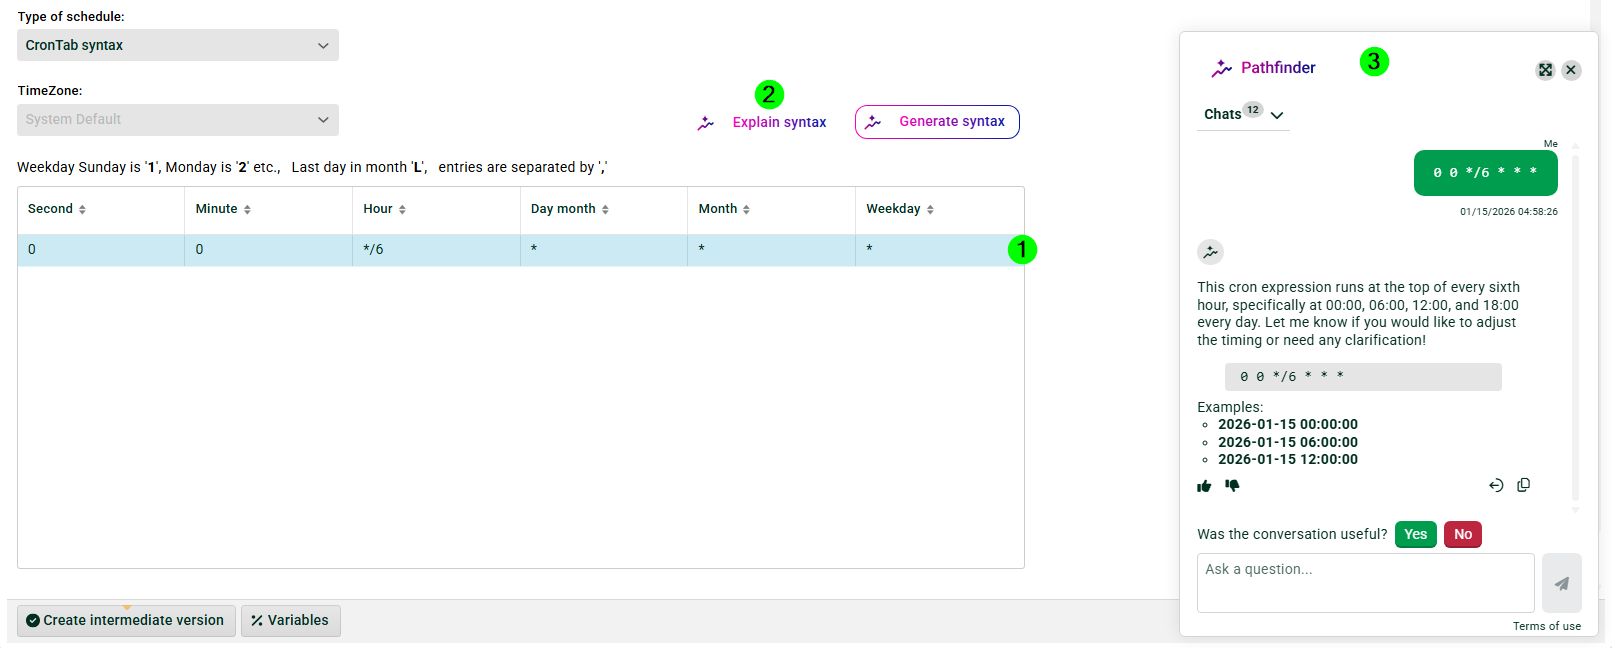
① Select a cron entry.
② Click the Explain syntax button.
③ Pathfinder opens and generates an explanation for your cron entry.
Generate syntax
You can also have the AI generate a cron entry for you.
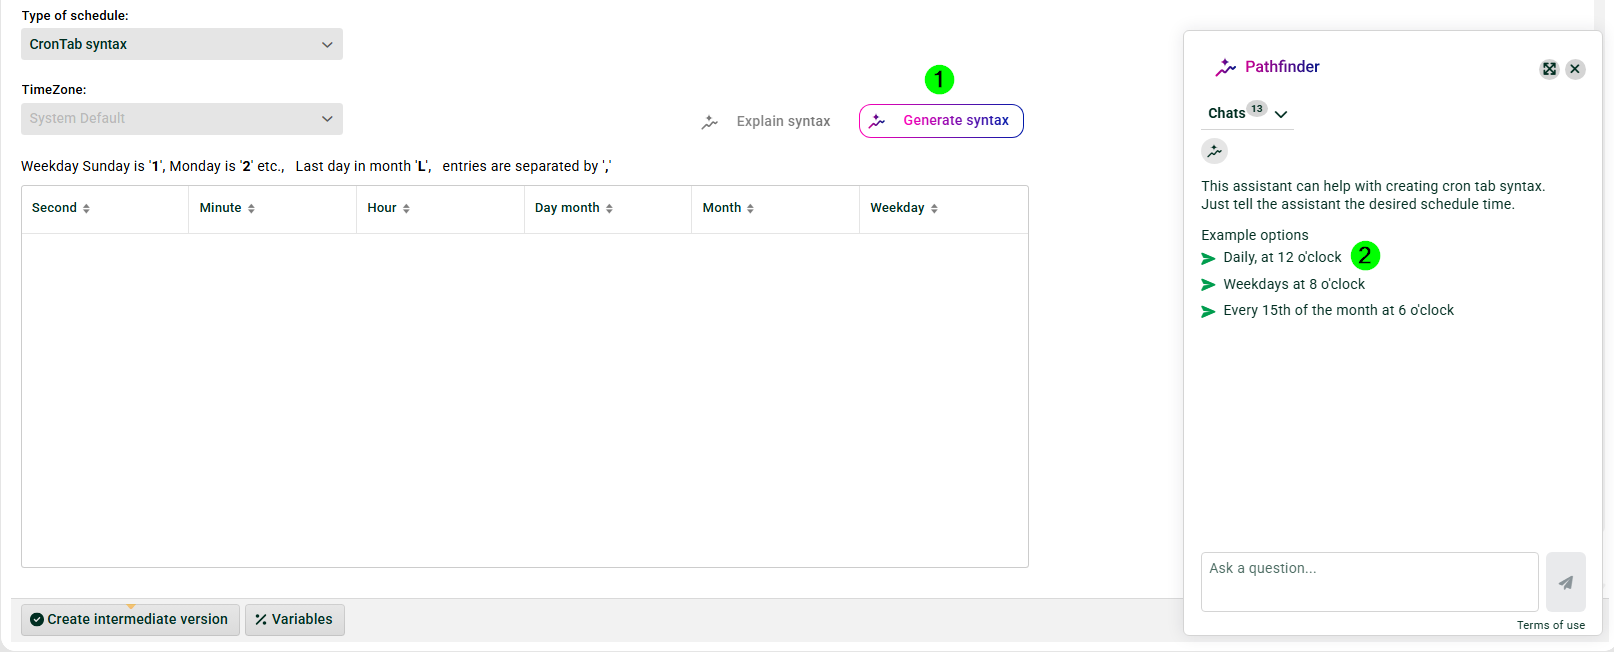
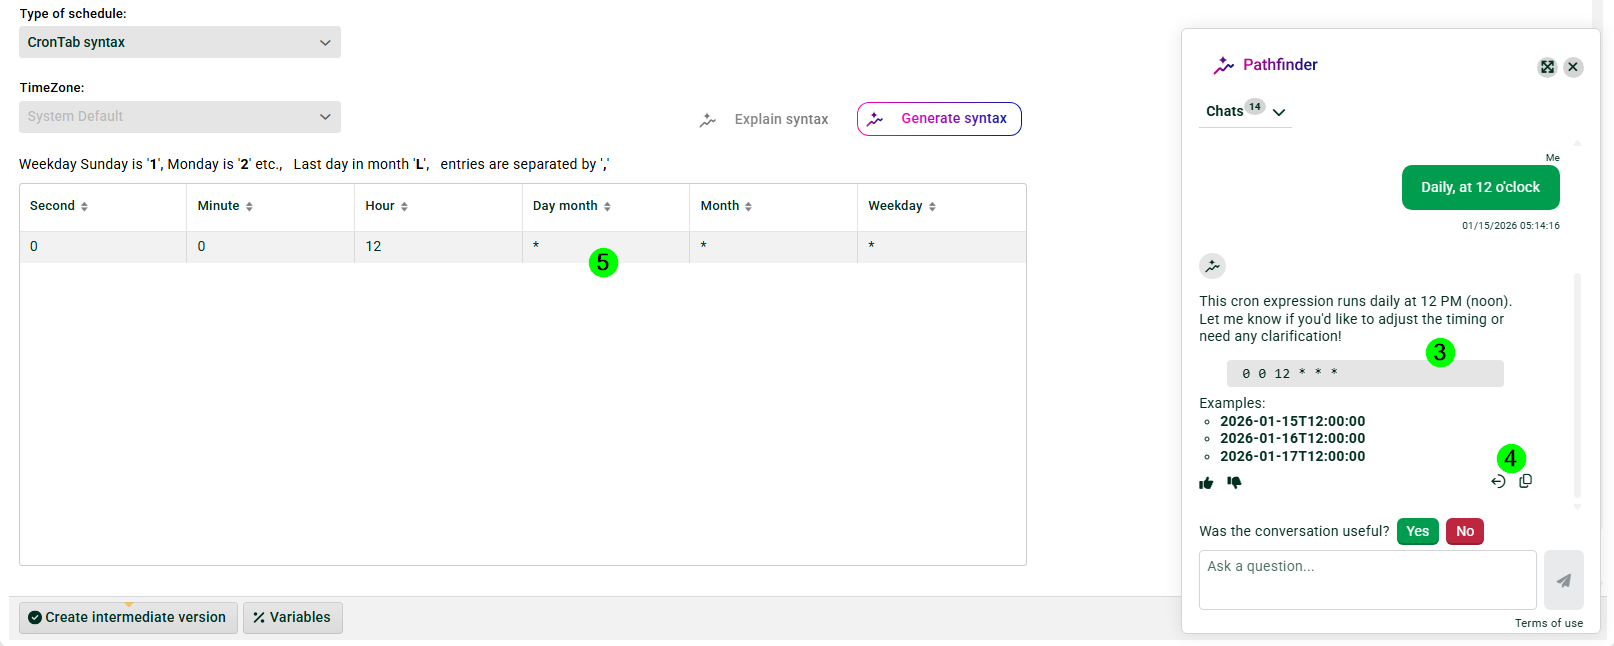
① Click the Generate syntax button.
② Select one of the example options, or enter your own description.
③ The generated cron entry.
IMPORTANT: AI can make mistakes. Always check the results before you use them.
④ Use these buttons to copy the cron entry or insert it directly into ⑤.