Version 1.0.1
The CEP Connector provides a unified integration for CEP service providers (courier, express, and parcel providers). It supports booking shipments, retrieving labels, and tracking shipments across different carriers. Integrate using the unified LobsterCEP data format. The CEP Connector handles the rest.
Key use cases
Book shipments and generate shipping labels in PDF, ZPL, or PNG format.
Retrieve near real-time tracking updates throughout the delivery process.
Retrieve proof of delivery (POD) after a shipment is delivered.
Prerequisites
Before you begin, make sure you meet the following requirements:
Lobster Data Platform, version 25.1 or later.
CEP API access and credentials for each carrier (username/password or client ID/client secret).
How it works
.jpg)
Bidirectional data flow between LobsterCEP Template Profiles and CEP Connector Profiles for shipment tracking and transport order management in a customer LDP environment.
The CEP Connector includes a package of profiles of two different types:
CEP_CONNECTOR profiles are fixed implementations with the full CEP Connector functionality. They contain the mappings between carrier API formats and the unified
LobsterCEPformat.TEMPLATE_LobsterCEP profiles are predefined templates. They simplify integration through the
LobsterCEPformat.
IMPORTANT:
Do not change CEP_CONNECTOR profiles. Changes affect the functionality and maintainability of the CEP Connector.
Shipment booking
The booking process books carrier shipments through their public APIs. The CEP Connector calls a mapper profile. This profile converts the LobsterCEP transport order into the carrier's required format. The connector then sends the data to the carrier system. The carrier system returns a synchronous response. The connector converts this response back into the LobsterCEP structure, using a specific CEP mapper profile. Finally, it forwards the processed data to your customer profile as a transport order confirmation. The response is either a confirmation with a shipping label or an error response with carrier feedback.
Shipment tracking
The tracking process retrieves shipment status updates from carriers through their public APIs. It reads Lobster Integration configuration files under ./conf/Connectors/CEP/Tracking. These files contain tracking details in CSV format. The polling logic retrieves only new tracking events, which prevents redundant data queries. If you use the booking process, the CEP Connector creates and updates the tracking configuration files automatically.
You can also fill in these files manually if you booked shipments another way. The tracking files use the following format:
carrierTrackingNumber;customerShipmentId;latestEventTimestamp;shipmentCreationTimestampThe connector fills in the latestEventTimestamp field automatically. Leave it empty during initial setup.
Example: Track shipment test123 automatically with DHL tracking number 1091847043 (created on 09/08/2025 at 10:00:00 AM). Add the following line to ./conf/Connectors/CEP/Tracking/List_ShipmentTrackingNumbers_DHL.csv:
1091847043;test123;;1757318400000For FedEx, UPS, PostNL, or GLS, use FEDEX.csv, UPS.csv, PostNL.csv, or GLS.csv instead of DHL.csv.
Installation
Preconfigured dataflows are available for Lobster Data Platform customers. They simplify integration with your carriers. The dataflows include:
CEP Connector profiles for connecting to different carrier APIs.
Template profiles for your mappings to or from the LobsterCEP shipment structure.
Partner channels for your carriers.
System constants for customizing the CEP Connector.
Import the package
Select Home > Start from template.
In the CEP Connector tile, select Install.
You automatically switch to Integration > DataFlow > Designer.
The Import package dialog loads. It contains four tabs:
Contents: Lists all included profiles and dataflows with type, name, status, and version.
Constants: Shows the constants included in the package.
Partners/channels: Shows the included partners and partner channels with import options.
Information: Contains additional information about the package.
Contents tab
The Contents tab shows all components included in the package:
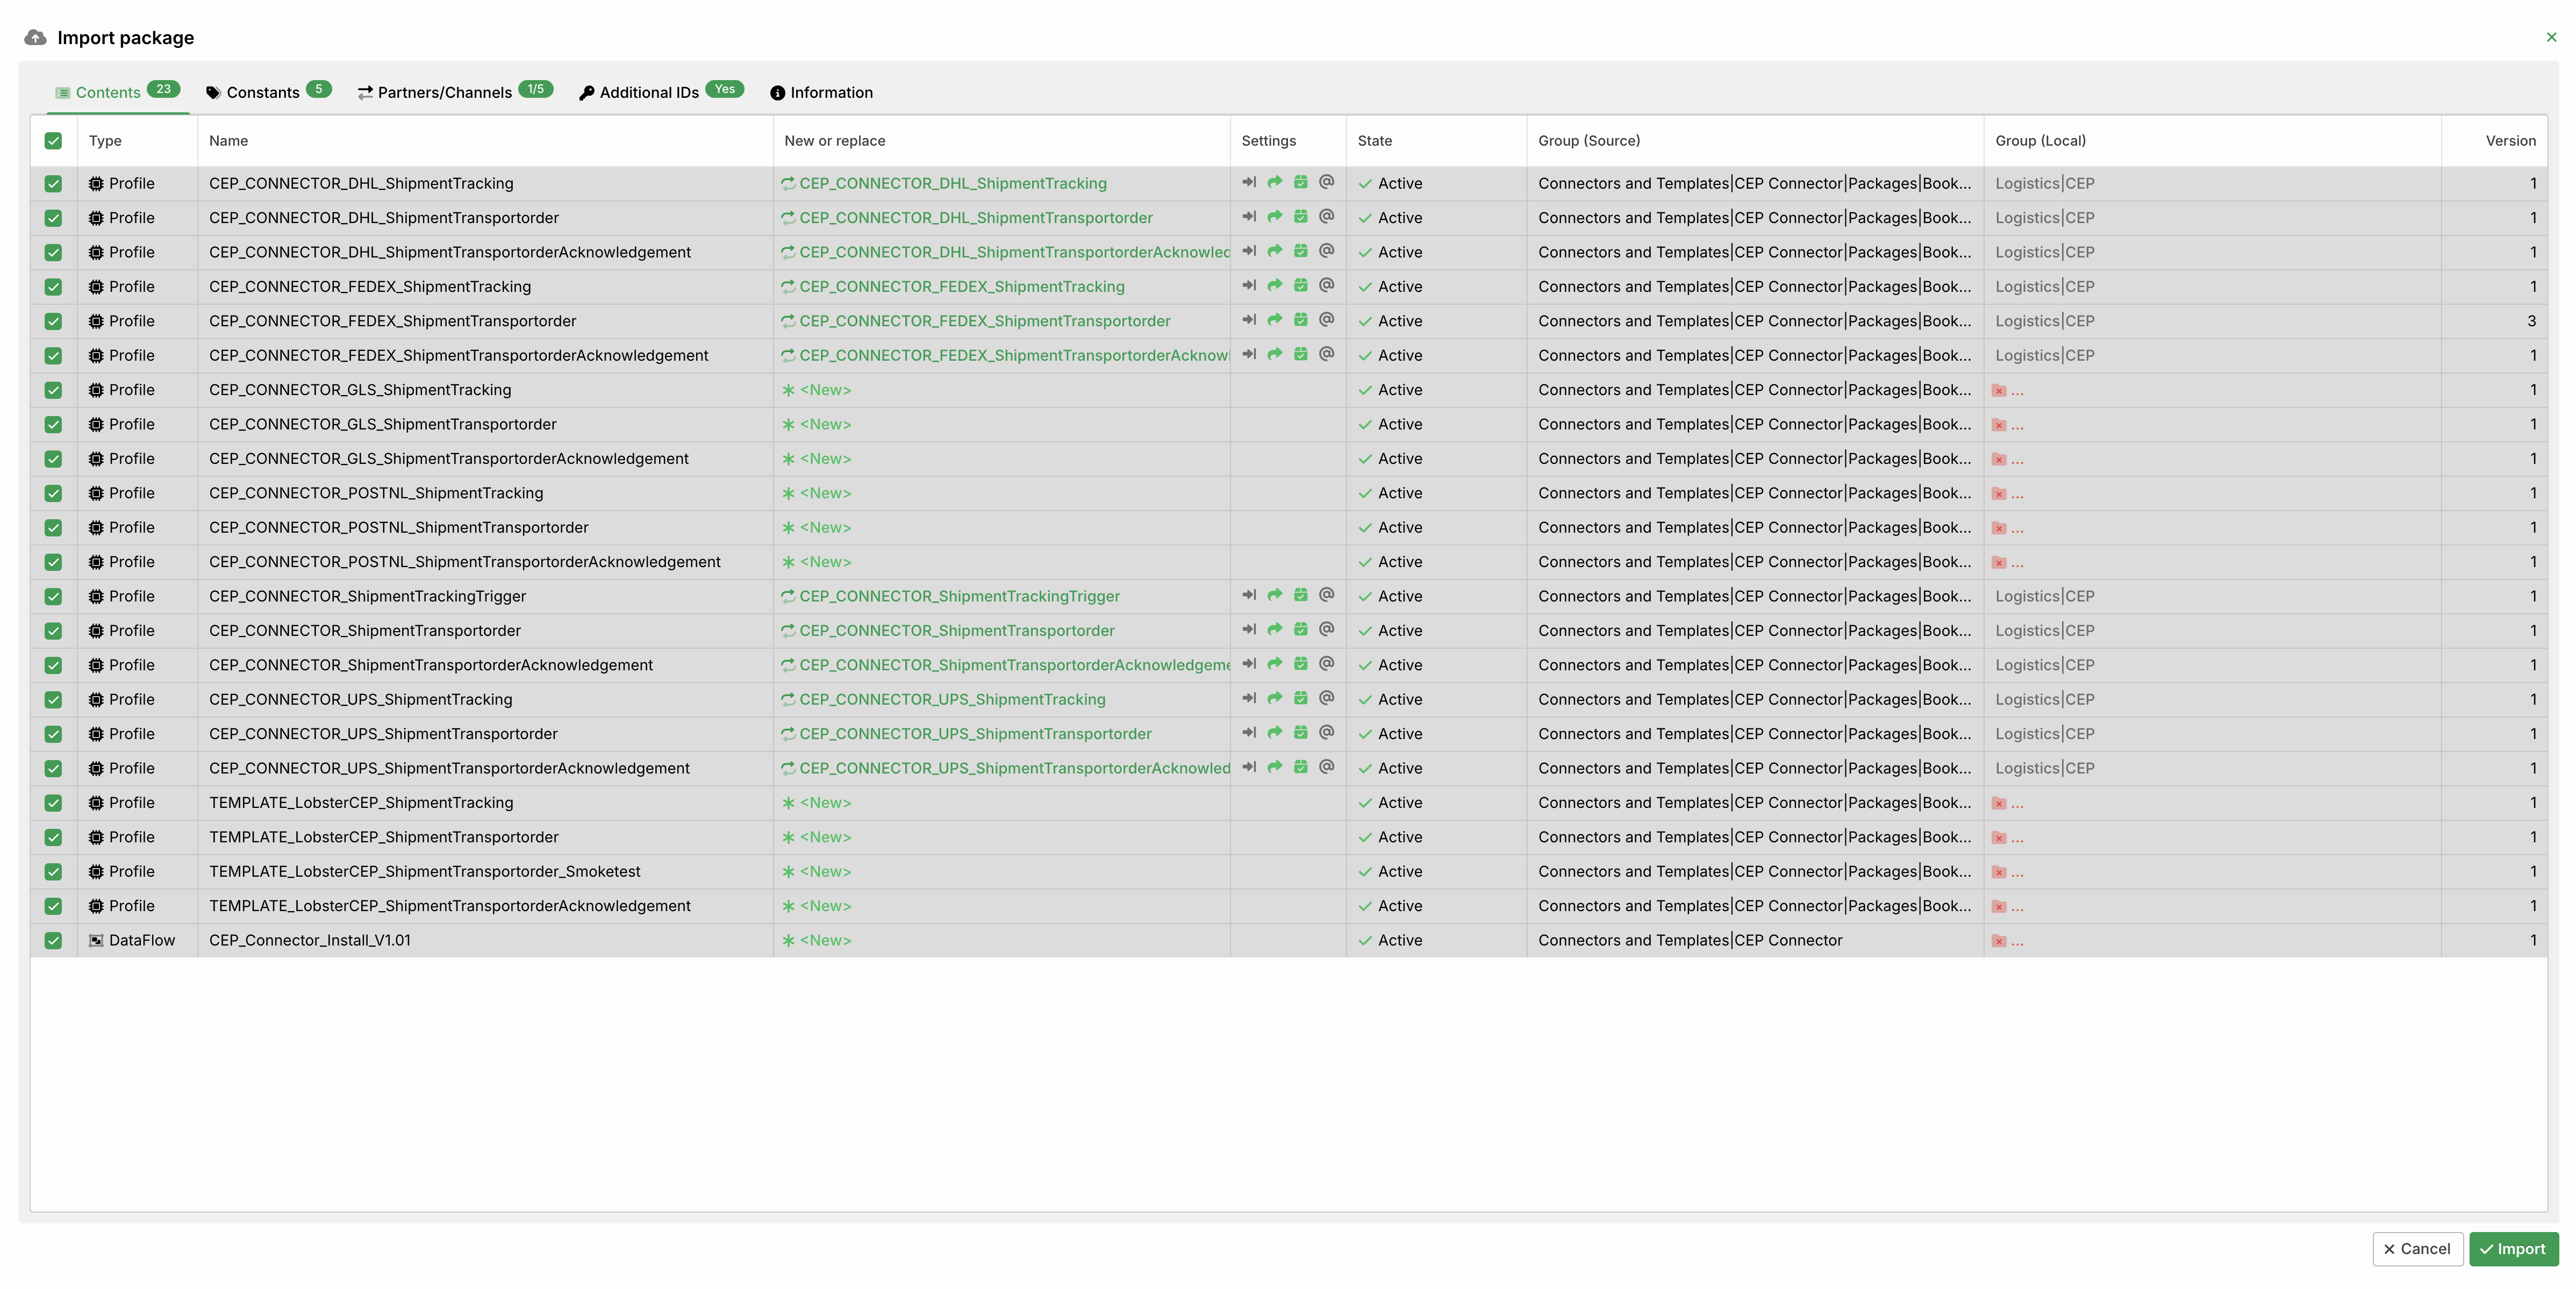
Import package dialog, Contents tab: overview of all profiles and dataflows.
The package V 1.01 includes the following components:
Type | Name | Status |
|---|---|---|
Profile |
| Active |
Profile |
| Active |
Profile |
| Active |
Profile |
| Active |
Profile |
| Active |
Profile |
| Active |
Profile |
| Active |
Profile |
| Active |
Profile |
| Active |
Profile |
| Active |
Profile |
| Active |
Profile |
| Active |
Profile |
| Active |
Profile |
| Active |
Profile |
| Active |
Profile |
| Active |
Profile |
| Active |
Profile |
| Active |
Profile |
| Active |
Profile |
| Active |
Profile |
| Active |
Profile |
| Active |
DataFlow |
| Active |
NOTE:
All profiles in this package have Active status and are ready to use immediately after import.
Group selection
Select a local group for each profile, or create a new one. Click the folder icon in the Group (Local) column.
Constants tab
The Constants tab shows the predefined constants for customizing the CEP Connector.
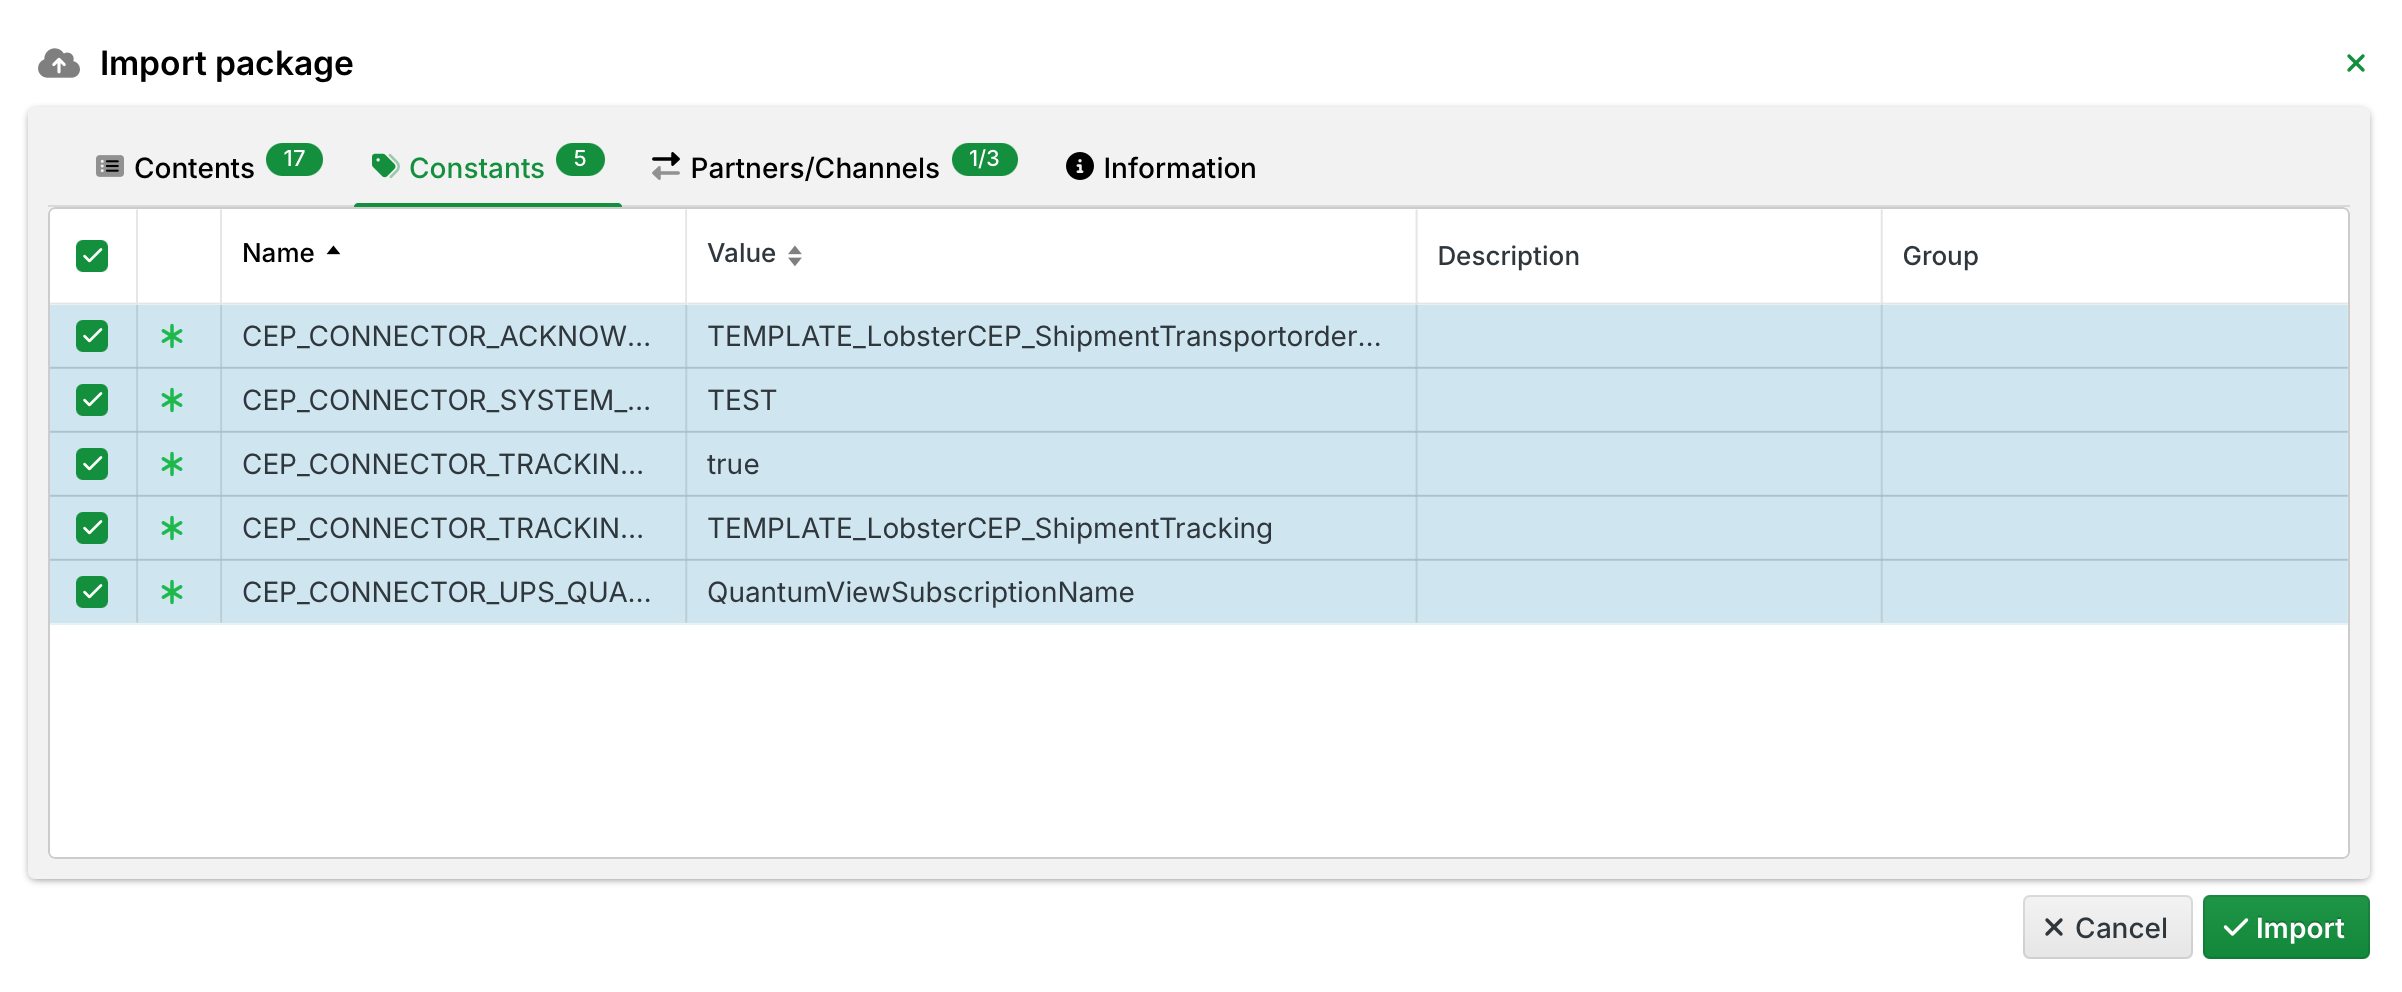
If these constants already exist, the import does not overwrite them by default.
Partners/channels tab
The Partners/channels tab shows the partners and partner channels included in the package. This package contains one partner with five partner channels. Choose whether to import or overwrite the preconfigured partner channels. If you don't enable the overwrite option, existing configurations remain unchanged during updates.
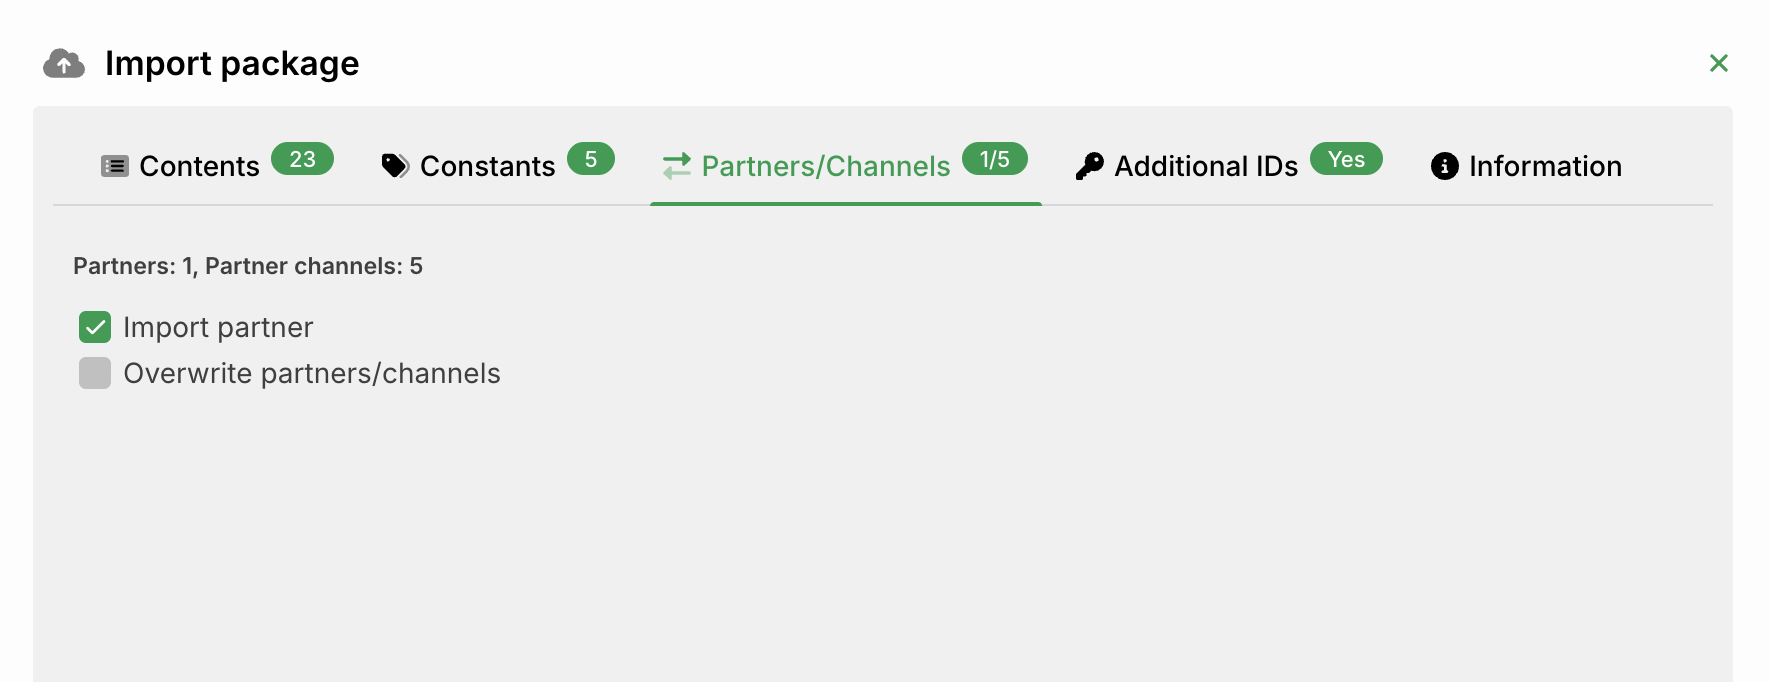
Import package dialog, Partners/channels tab: import options for partners and partner channels.
The following options are available:
Import partner: Imports the CEP partner (CEP Partner) with its associated HTTPS channel. This option is enabled by default.
Overwrite partners/channels: Overwrites existing partners and channels with the same name. Enable this option only if you intentionally want to replace an existing configuration.
IMPORTANT:
Is the CEP Connector partner already present in your environment and customized? If so, leave Overwrite partners/channels disabled.
Complete the import
Review the components shown on all tabs. Click Import and confirm the dialog to start the import.
Configure credentials
Required credentials per carrier
Carrier | Credential type | Source |
|---|---|---|
DHL Express | Basic auth: username and password | |
FedEx | Client ID and client secret | FedEx Developer Portal, "How to get API Credentials" section |
UPS | Client ID and client secret | UPS Developer Portal, "Getting Started with UPS APIs" section |
PostNL | API key | PostNL Developer Portal, "How to Get Started" section |
GLS | Client ID and client secret | GLS Developer Portal, "Get started" section |
Configure the partner channel
Navigate to Administration > Partner > Partners/Channels > CEP Connector.
DHL_Express_HTTPS
Enter your DHL Express username in the Own ID field.
Enter your DHL Express password in the Own Password field.
FedEx_HTTPS
Select Configure OAuth 2.0….
Enter your client ID and client secret.
Select Client Credentials as the grant type.
Enter the Endpoint URL:
Test:
https://apis-sandbox.fedex.com/oauth/tokenProd:
https://apis.fedex.com/oauth/token
Select Fetch Access Token.
Enter the OAuth2 Refresh URL:
Test:
https://apis-sandbox.fedex.com/oauth/token?grant_type=client_credentials&client_id=<clientId>&client_secret=<clientSecret>Prod:
https://apis.fedex.com/oauth/token?grant_type=client_credentials&client_id=<clientId>&client_secret=<clientSecret>
UPS_HTTPS
Select Configure OAuth 2.0….
Enter your client ID and client secret.
Enable Send 'client credentials' in header.
Select Authorization Code as the grant type.
Enter the Endpoint URL:
Test:
https://wwwcie.ups.com/security/v1/oauth/tokenProd:
https://onlinetools.ups.com/security/v1/oauth/token
Enter the Redirect URL. Use the internal address of your Lobster Data Platform:
https://<your-server>:<your-port>/dw/oauth2/<your-Application-ID>The application ID starts with
_data. You find it in your OAuth 2.0 settings. Also register this URL in the UPS Developer Portal, under the application settings.Enter the OAuth URL:
Test:
https://wwwcie.ups.com/security/v1/oauth/authorizeProd:
https://onlinetools.ups.com/security/v1/oauth/authorize
Select Fetch Access Token. You're redirected to UPS to enter your developer account credentials.
After a successful redirect, a blank page with
okappears. Open the channel again. TheSYS_HTTP_OAUTH2andSYS_HTTP_OAUTH2_REFRESHtokens are now visible under Additional IDs.Enter the OAuth2 Refresh URL:
Test:
https://wwwcie.ups.com/security/v1/oauth/refresh?grant_type=refresh_token&refresh_token=<refreshToken>&client_id=<clientId>&client_secret=<clientSecret>&useCredentialsInHeaderProd:
https://onlinetools.ups.com/security/v1/oauth/refresh?grant_type=refresh_token&refresh_token=<refreshToken>&client_id=<clientId>&client_secret=<clientSecret>&useCredentialsInHeader
PostNL_HTTPS
Add your API key as
SYS_HTTP_apikeyon the Additional IDs tab.
GLS_HTTPS
Select Configure OAuth 2.0….
Enter your client ID and client secret.
Select Client Credentials as the grant type.
Enter the Endpoint URL:
Test:
https://api-sandbox.gls-group.net/oauth2/v2/tokenProd:
https://api.gls-group.net/oauth2/v2/token
Select Fetch Access Token.
Enter the OAuth2 Refresh URL:
Test:
https://api-sandbox.gls-group.net/oauth/token?grant_type=client_credentials&client_id=<clientId>&client_secret=<clientSecret>Prod:
https://api.gls-group.net/oauth/token?grant_type=client_credentials&client_id=<clientId>&client_secret=<clientSecret>
Use profile templates for custom mappings
Direction | Template profile | Description |
|---|---|---|
📤 Send shipments |
| Sends LobsterCEP shipments to the booking connector. Replace the source structure with your custom format, and map it to the prefilled LobsterCEP format. |
📥 Receive shipments |
| Receives LobsterCEP shipment confirmations. Replace the target structure with your custom format, and process the received shipment. |
📥 Receive tracking |
| Receives LobsterCEP tracking data. Replace the target structure with your custom format, and process the tracking data. |
Smoke test |
| Quick test of the booking connector. Right-click the profile and select Restart > Start Cron. Set |
IMPORTANT:
Do not change CEP_CONNECTOR profiles. Changes affect the functionality and maintainability of the CEP Connector.
Configuration constants
The following system constants configure the CEP Connector. (M) = mandatory, (D) = dependent, (O) = optional.
Constant | Type | Valid values | Default | Description |
|---|---|---|---|---|
| (M) |
|
| Specifies the system type. Controls the target environments for endpoints and other variables. |
| (D) | Profile name |
| Profile that receives the booking response. Required if you use the booking process. |
| (D) | Profile name |
| Profile that receives the tracking responses. Required if you use the tracking process. |
| (O) |
|
| Automatically include proof of delivery (POD) in tracking responses. |
| (D) | Subscription name(s), comma-separated | - | Required if you use UPS tracking. Enter your Quantum View subscription name. |
| (O) | Channel ID | - | Overrides the default DHL Express HTTPS channel. Create this constant manually if you already use a DHL Express API channel. |
| (O) | Channel ID | - | Overrides the default FedEx HTTPS channel. Create this constant manually if you already use a FedEx API channel. |
| (O) | Channel ID | - | Overrides the default UPS HTTPS channel. Create this constant manually if you already use a UPS API channel. |
| (O) | Channel ID | - | Overrides the default PostNL HTTPS channel. Create this constant manually if you already use a PostNL API channel. |
| (O) | Channel ID | - | Overrides the default GLS HTTPS channel. Create this constant manually if you already use a GLS API channel. |
Input data structure: shipment booking
Pass the following LobsterCEP data structure to the CEP_CONNECTOR_ShipmentTransportorder profile. The connector maps it to the carrier format, calls the carrier API, and forwards the result to your acknowledgement profile.
Output data structure: shipment booking
Result | Description | Structure |
|---|---|---|
Confirmed | Shipment booked successfully; the response returns the label and carrier reference. |
|
Error | Booking failed; the response includes carrier feedback. |
|
Example: confirmed booking
{
  "LobsterCEP": {
    "header": {
      "carrierId": "DHL_EXPRESS",
      "processingStatus": {
        "code": "CONFIRMED",
        "realizationDateTime": "2025-08-13T09:33:59+02:00"
      }
    },
    "shipment": {
      "shipmentId": "ABC123456789",
      "carrierReference": "987654321",
      "estimatedDeliveryDate": "2025-08-18T23:59:00Z",
      "documents": [
        {
          "type": "LABEL",
          "name": "LABEL_987654321.pdf",
          "format": "PDF",
          "content": "<base64-encoded content>"
        }
      ],
      "trackingUrl": "https://express.api.dhl.com/mydhlapi/test/shipments/987654321/tracking"
    }
  }
}
Example: error response
{
  "LobsterCEP": {
    "header": {
      "carrierId": "DHL_EXPRESS",
      "processingStatus": {
        "code": "ERROR",
        "reason": "1001: The requested product(s) (P) not available based on your search criteria.",
        "realizationDateTime": "2025-08-13T09:33:59+02:00"
      }
    },
    "shipment": {
      "shipmentId": "ABC123456789"
    }
  }
}
Output data structure: shipment tracking
The CEP_CONNECTOR_ShipmentTrackingTrigger profile polls the carrier automatically for new events. It delivers the following LobsterCEP structure to your tracking target profile. You don't need to call it yourself. Configure the tracking CSV files as described in the Shipment tracking section.
Example: tracking
{
  "LobsterCEP": {
    "header": { "carrierId": "DHL_EXPRESS" },
    "shipment": [
      {
        "shipmentId": "ABC123456789",
        "carrierReference": "987654321",
        "estimatedDeliveryDate": "2025-08-18T23:59:00Z",
        "trackingEvents": [
          {
            "owner": "DHL_EXPRESS",
            "eventDateTime": "2025-09-01T01:43:03Z",
            "eventLocation": "CPH (Copenhagen-DK)",
            "statusDetails": [{ "code": "OK", "statusDescription": "Delivered" }]
          }
        ],
        "documents": [
          {
            "type": "POD",
            "name": "POD_987654321.pdf",
            "format": "PDF",
            "content": "<base64-encoded content>"
          }
        ],
        "trackingUrl": "https://express.api.dhl.com/mydhlapi/test/shipments/987654321/tracking"
      }
    ]
  }
}